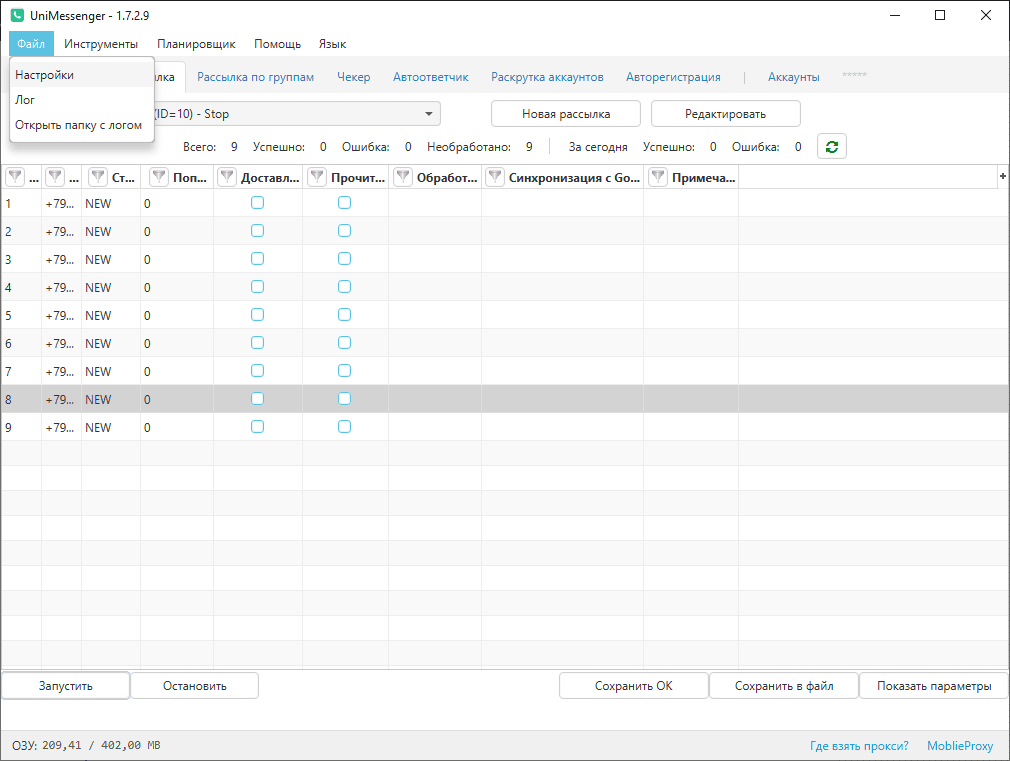
File → UniMessenger Settings / Log
Some screenshots or videos may show an outdated interface. There are no critical changes that affect understanding of the main functions.
Settings and Log live in the top toolbar under the "File" dropdown (see Screen 1).
Settings — include several tabs: Basic, Emulator, Export/Import, Proxifier, Other. More on each tab below.
Log — a text file that automatically records important information about the program's work (user actions, errors, updates, etc.). The current log can be cleared. The main log file is at: UniMessenger program folder → logs folder → main-log.txt.
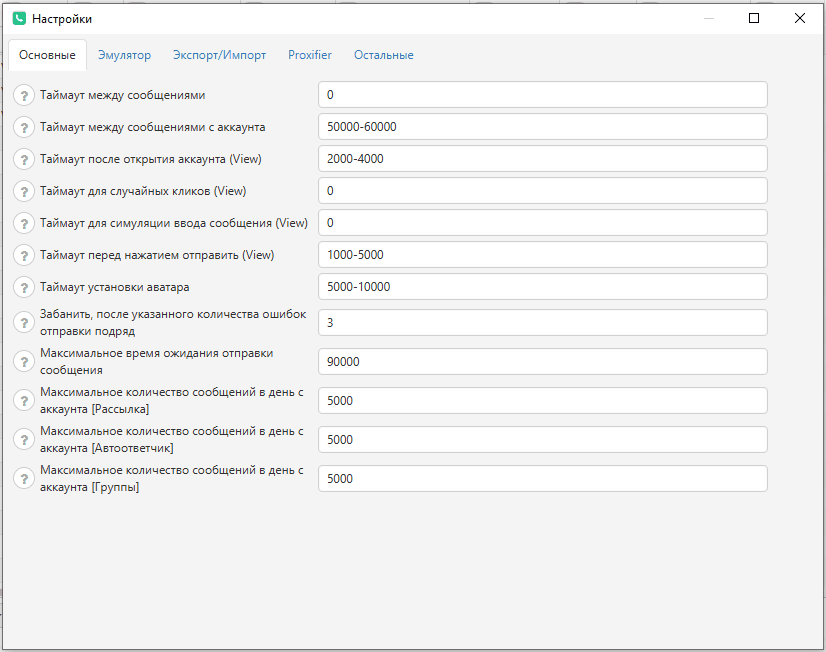
"Basic" tab
All timeouts are specified in ms, i.e. 60000 is 60 sec.
- Timeout between messages — timeout between every message in the broadcast.
- Timeout between messages per account — timeout between messages for an account, i.e. every account will send messages no more often than once per the specified interval.
- Timeout after opening an account
— Timeout for random clicks — during the specified time before sending a message, clicks will be made at random places on the screen.
- Timeout for message-input simulation
— Timeout before pressing send
- Avatar set timeout — the time the program waits for the image to load into the gallery when setting an avatar for an account.
- Ban after the specified number of consecutive sending errors — the program will mark the account as banned, with the ban reason ERR_MSG, if it fails to send the specified number of messages in a row. For example, if set to 3, after 3 failed message sends the account will be marked as banned.
- Maximum wait time for sending a message — during a broadcast the program "inserts" the message and waits the specified time for WhatsApp to send it.
- Maximum messages per day per account — (broadcast / autoresponder / groups) — you can set limits for messages sent within a private-message broadcast, the autoresponder, and the group broadcast.
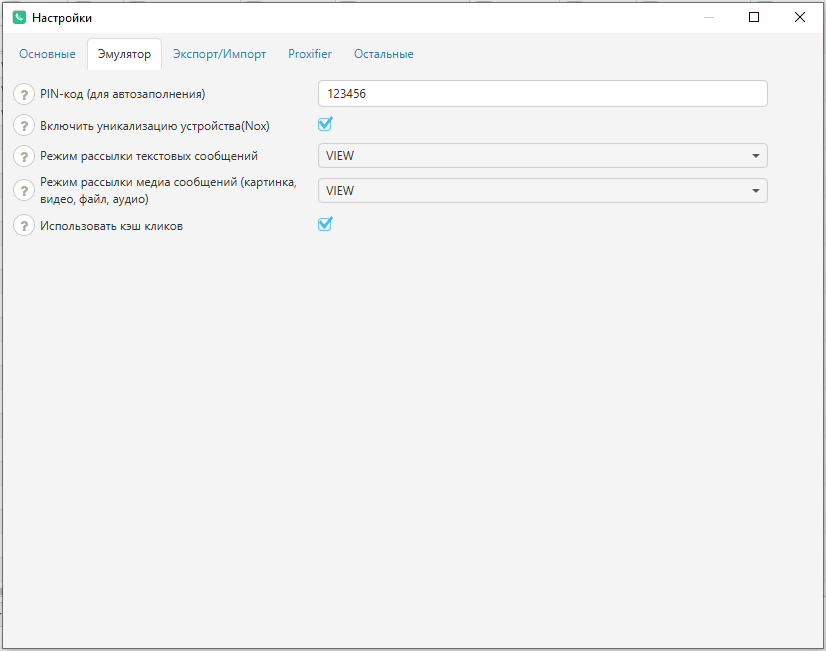
"Emulator" tab
- PIN code (for autofill) — the specified PIN code will be entered automatically when an account is opened and a PIN-entry form is present. The PIN code for auto-registration is set in the Auto-registration settings.
- Text-message broadcasting mode — by default VIEW, sending is done through the app's UI, some buttons are pressed by clicks inside the emulator. Every message is sent separately. COPY_DB mode — sending messages via direct "insertion"
into WhatsApp: WhatsApp closes, messages are "inserted", WhatsApp opens, sees the unsent messages, and sends them.
- Media-message broadcasting mode (image, video, file, audio) — by default VIEW, better suited for sending images.
- Use click cache — the click cache is enabled by default; you can disable it if needed. (More: What the click cache is / Cache Manager).
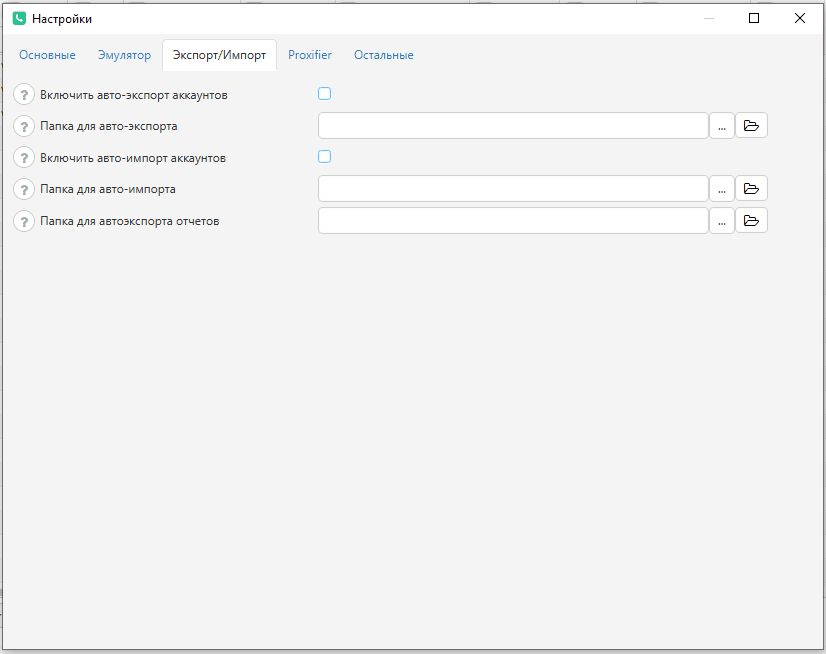
"Export/Import" tab
For users with two or more licenses.
Auto-export and auto-import of accounts can be enabled to automatically move accounts between different PCs where licenses are bound and work is done. For example, you have 2 UniMessenger licenses. You use the first to register accounts: enable auto-import and specify a folder bound to a cloud service (Yandex Disk, etc.). The second license, on another PC, is for broadcasting: enable auto-export and specify a folder bound to a cloud service (Yandex Disk, etc.) — the same one as for the first license. This way, accounts are registered on one PC, automatically uploaded to the cloud, downloaded from there to the folder on another PC, then auto-imported and end up in the program.
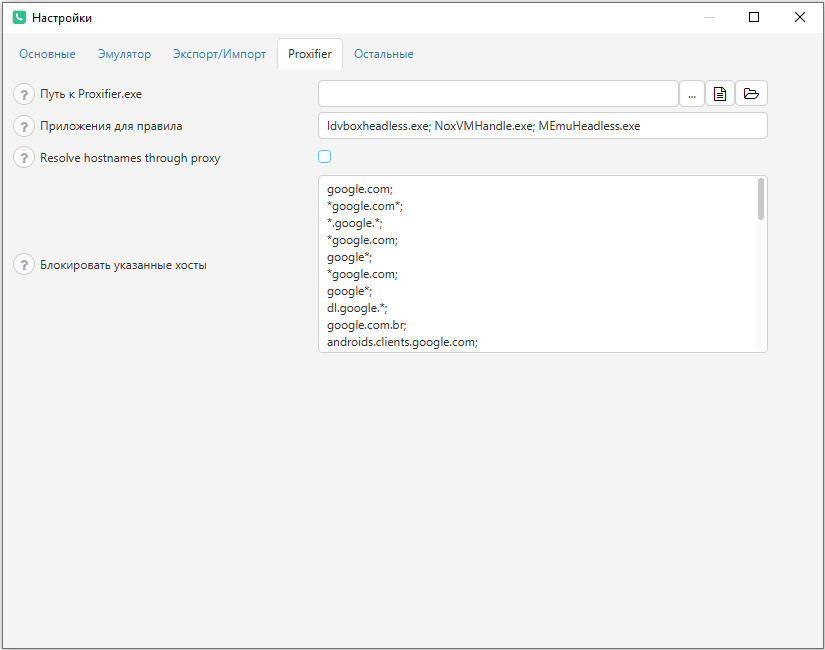
"Proxifier" tab
These settings apply when using the PROXIFIER or PROXIFIER_BY_PID proxy modes. More about mode selection and proxy settings — here.
- Path to Proxifier.exe — so the program can enable the proxy via Proxifier.
- Applications for the rule — applications that will be specified in the rule when setting a proxy in Proxifier.
- Resolve hostnames through proxy — enable / disable the "Resolve hostnames through proxy" setting when setting a proxy in Proxifier.
- Block listed hosts — when setting rules in Proxifier, an additional rule will always be added that blocks the specified hosts in the specified applications.
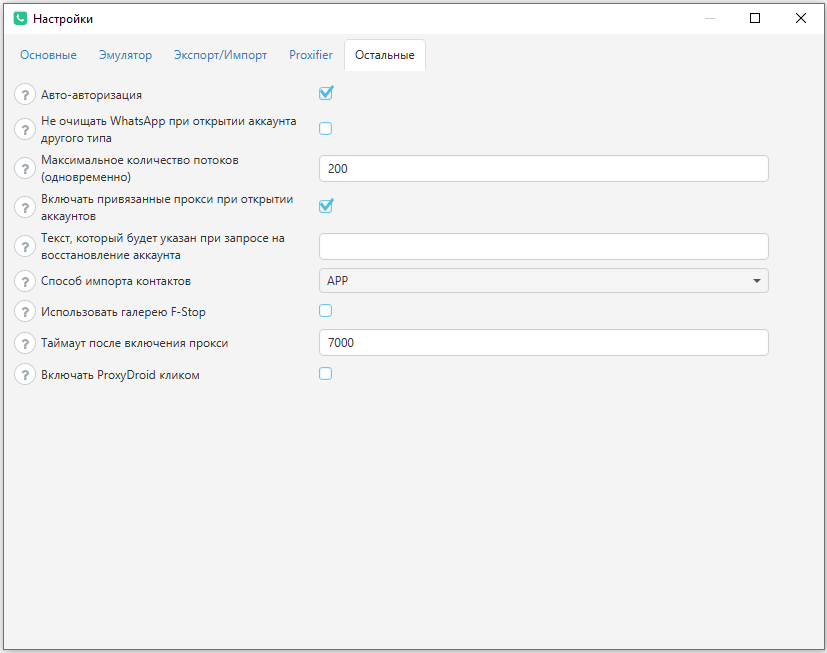
"Other" tab
- Don't clear WhatsApp when opening an account of another type — if disabled: when an account in WhatsApp is opened via the program in the emulator, WhatsAppBusiness in the emulator will be cleared, and vice versa. If enabled: the program won't control this and won't clear the other WhatsApp apps.
- Enable bound proxies when opening an account — when accounts are opened on the Accounts tab.
- Contact import method — the chosen contact import method will be used everywhere except the Checker — the task of checking numbers on WhatsApp. VCARD — importing a file with numbers in vCard format into the Contacts app. DB — importing numbers via the database. APP — contacts are added via Android tools.
- Use F-Stop gallery — if enabled, the F-Stop gallery will be used when setting the avatar.
- Timeout after enabling a proxy — for the programs or apps to turn the proxy on they may need time, so you need to wait after enabling so your accounts don't open while the proxy is starting up.
- Enable ProxyDroid by click — if disabled, then when enabling the proxy via ProxyDroid the app's UI will not be used. If enabled, ProxyDroid will be opened and the program will click the proxy-enable checkbox.