Automation
On the "Automation" tab you can create, edit, and delete tasks (see Screens 1–2).
Some screenshots or videos may show an outdated interface. There are no critical changes that affect understanding of the main functions.
On the "Automation" tab you can create, edit, and delete tasks (see Screens 1–2).
-
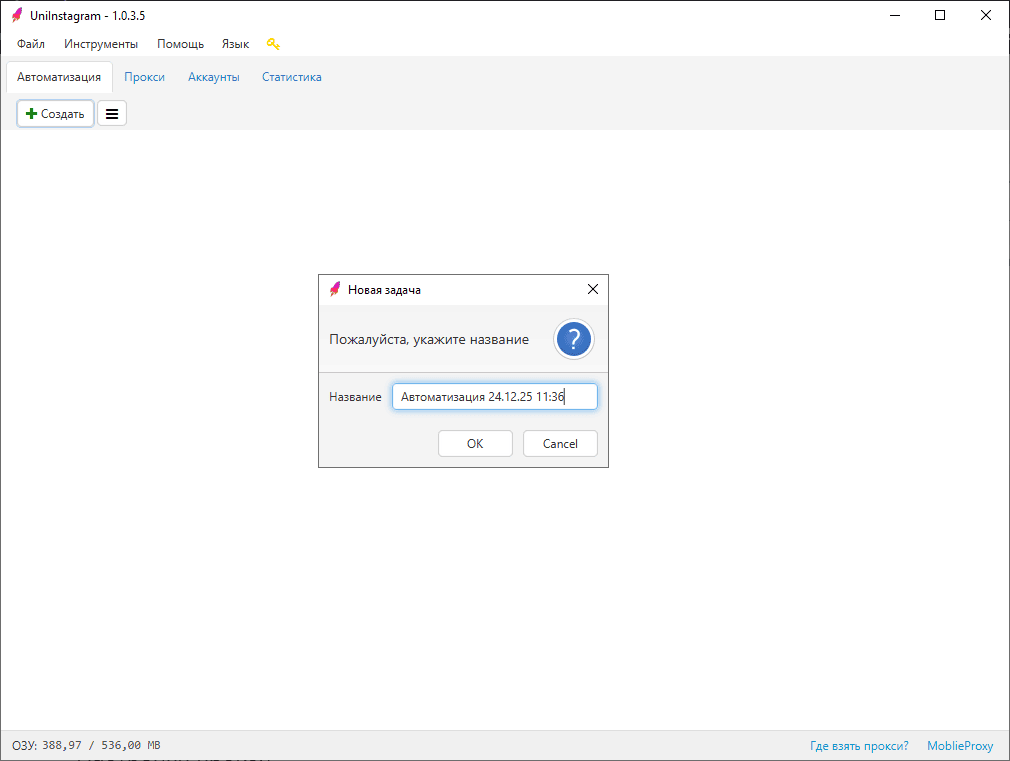
"Create" button — clicking it opens a window where you can set a name for the automation or use the default name in the format: "Automation current date and time" (see Screen 1).
-
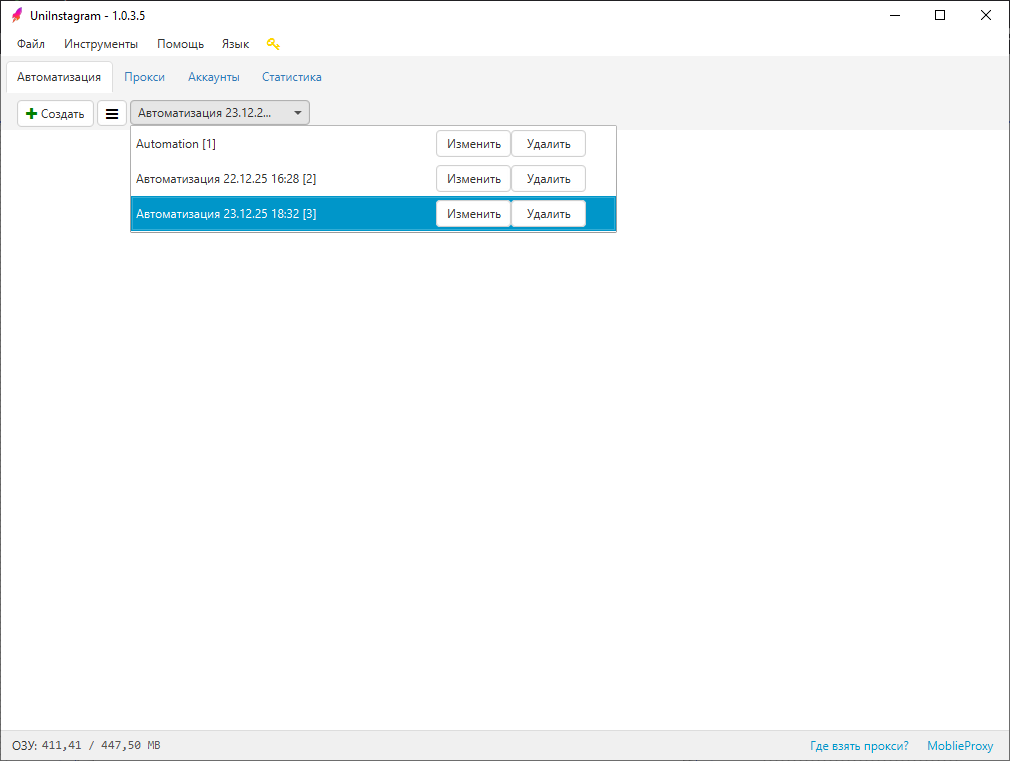
"≡" button — shows/hides the menu with previously created tasks (see Screen 2).
-
Click a task name in the menu to open it.
-
Click the "Edit" button to rename a task.
-
Click the "Delete" button to delete a task (the program asks for confirmation).
-
Click the cross (✕) on a task to close it (this action doesn't delete the task, it hides it from the list of open tasks).
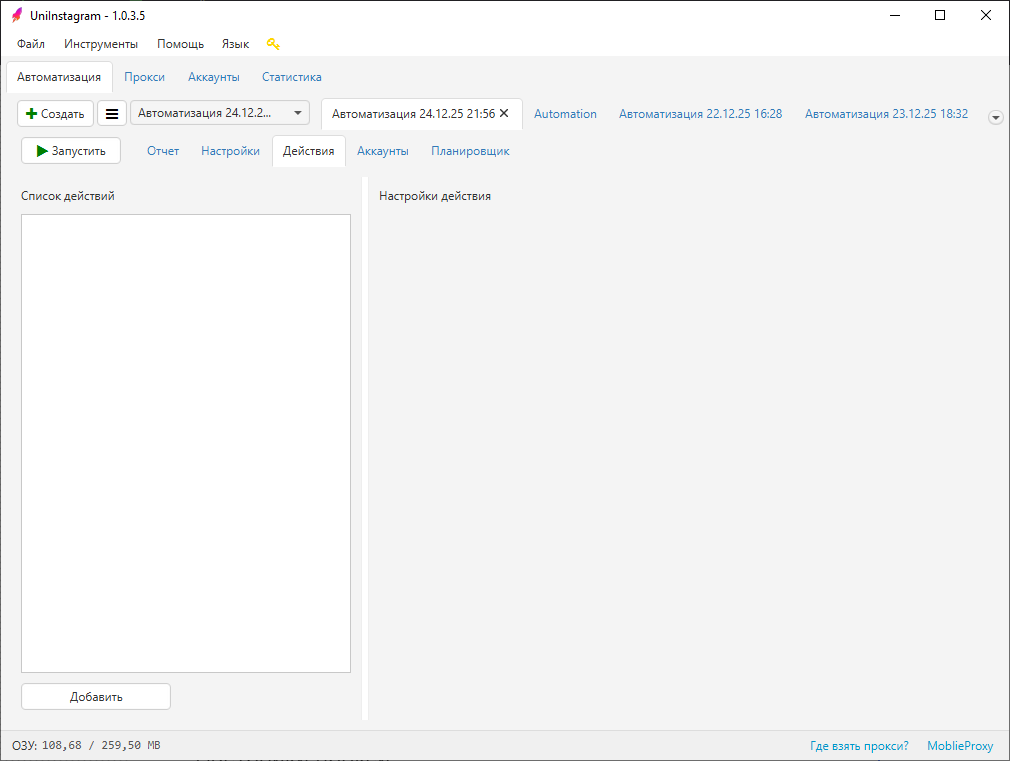
The list of open tasks can have several tasks open at once (see Screen 3). If there are many tasks, a down arrow (⯆) appears on the right. Clicking it shows the rest of the tasks as a dropdown. You can scroll the tab row with the mouse wheel without switching between tasks.
For created tasks the following tabs are available: Report, Settings, Actions, Accounts, Scheduler.
The "Start"/"Stop" button starts the task, which can be stopped after launch. Click it after applying settings and adding actions for the selected accounts.
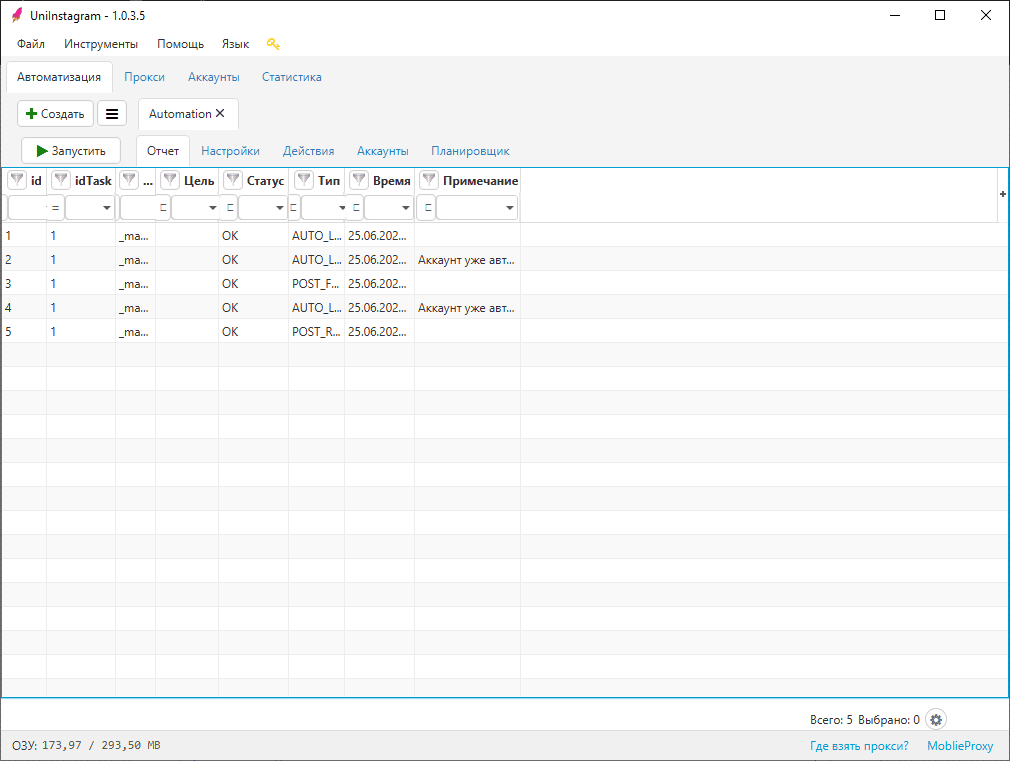
Report
The report shows data for every action (see Screen 4).
- Account — which account the action was performed for.
- Target — for actions like like, follow, and so on: the username of the account that was interacted with.
- Status — whether the action succeeded (OK/ERROR).
- Type — which action was performed.
- Time — when the action was performed (date, time).
- Note — a comment on the performed action if needed (for example, "Account already signed in" — on a repeated sign-in action, "Timeout" — when an error occurs in the Status).
Settings
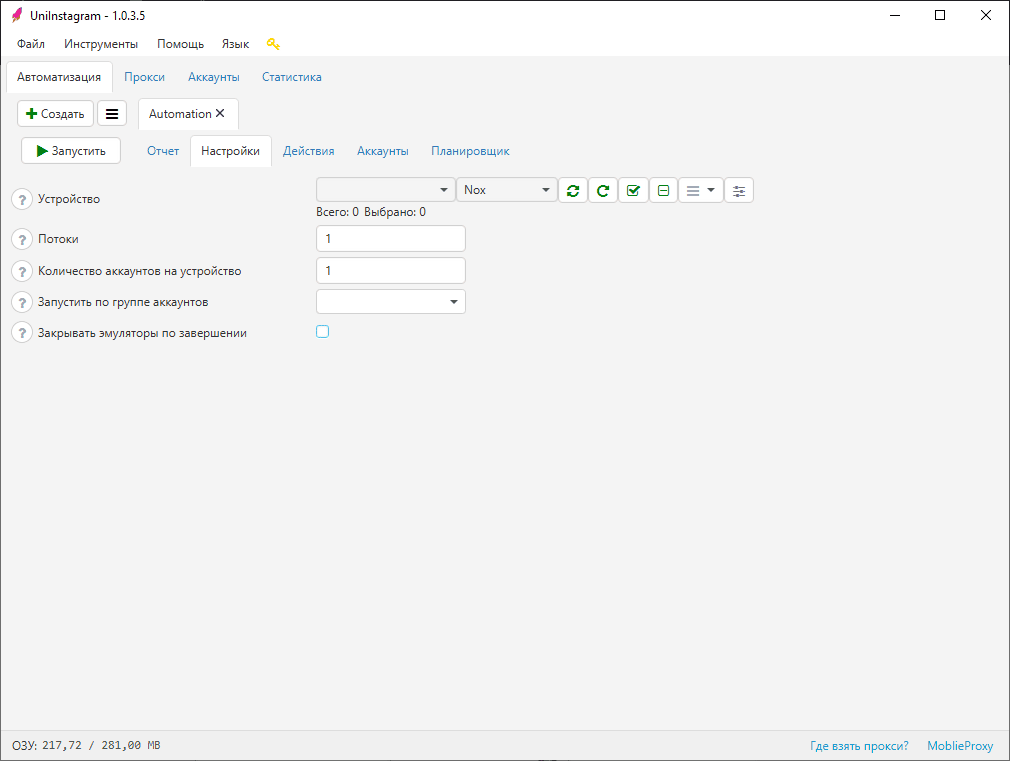
- Device — pick a device (emulator / phone) and the number of devices.
- Threads — the value sets how many devices launch at the same time. For example, if the value is 3, 3 devices will launch at a time. The more threads, the higher the CPU load, which increases the chance of slowdowns.
- Accounts per device — that many accounts will run on one device.
- Run by account group — pick the desired group to run automation for all accounts in it at once.
- Close emulators on completion — if enabled: the selected devices will be closed after the task ends; if disabled, the devices will stay open after the task ends.
Actions
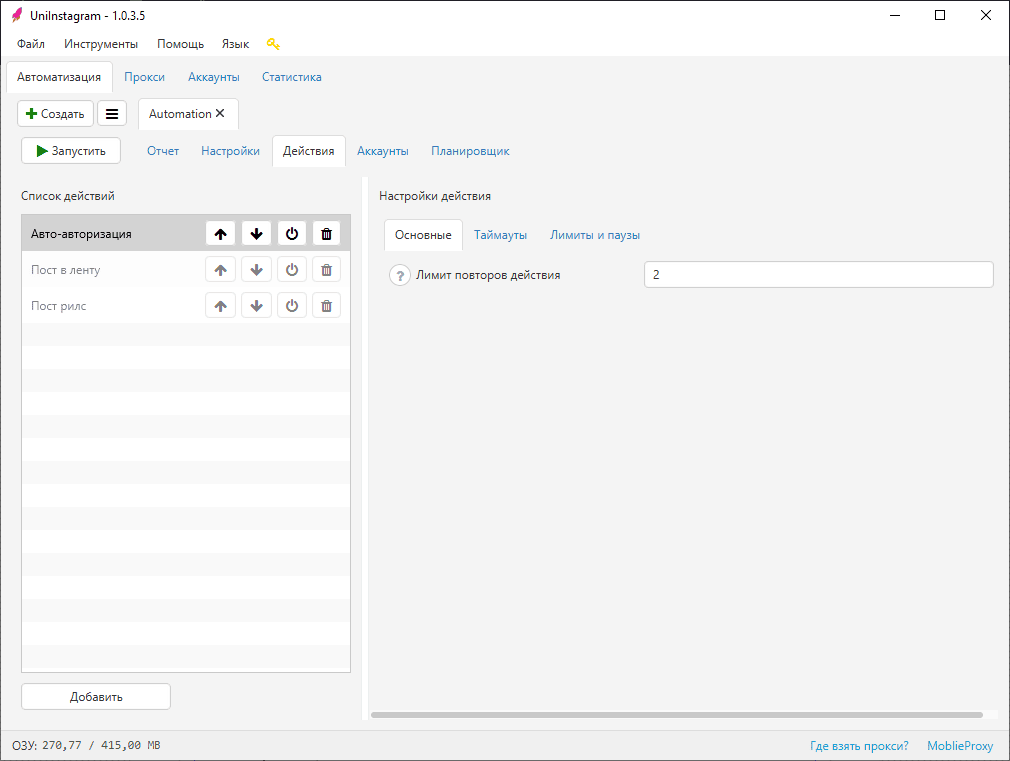
Add button — lets you add the following actions: Post Stories, Post Reels, Post to Feed, Like, Follow, Unfollow, DM, View Stories, Auto-Login, Edit Profile, 2FA (enable), Pause, GET Request, Repost to Stories, Scroll Feed, Scroll Recommendations, Accept Requests, Share Profile, Change Account Group, Auto-Reply to Followers.
Actions list — shows all the actions that were added. You can reorder them using arrows (↑) and (↓), as well as enable / disable and delete specific actions.
Action settings — each action has its own settings: limits and pauses, timeouts, retries, attaching files, and so on.
More on actions and their settings — here.
Accounts
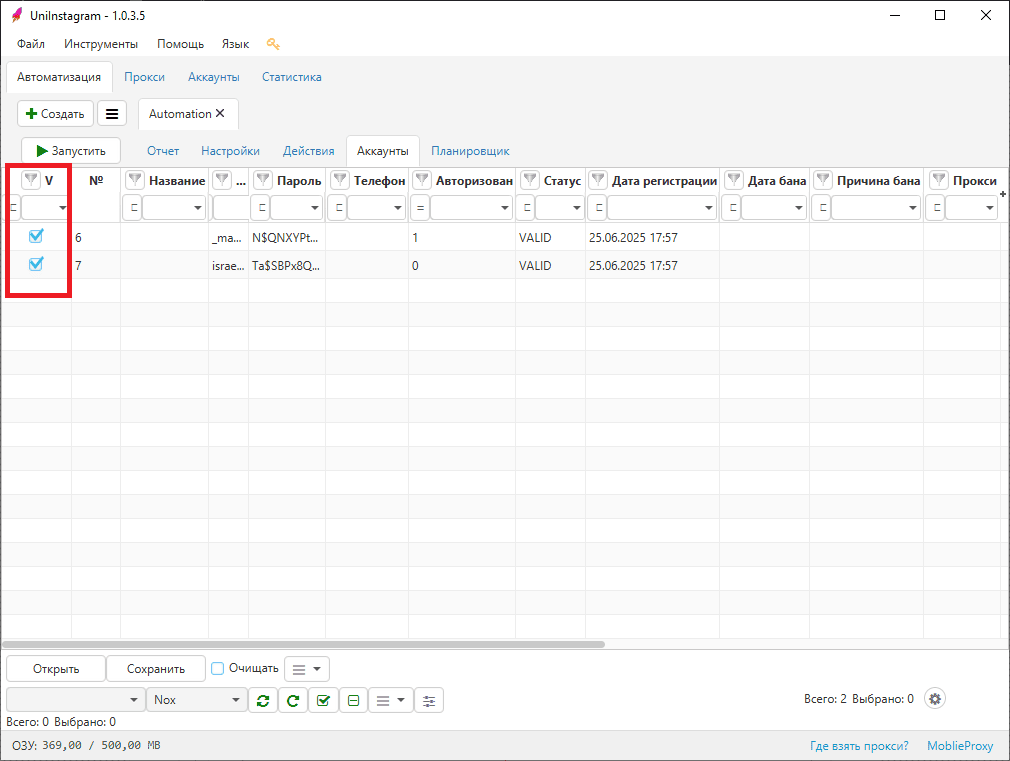
Use the checkbox to pick which accounts will take part in the automation. If an account is already bound to an emulator / phone, it won't work on another device. To make it work, you need to clear the device column or delete it manually.
More about Accounts.
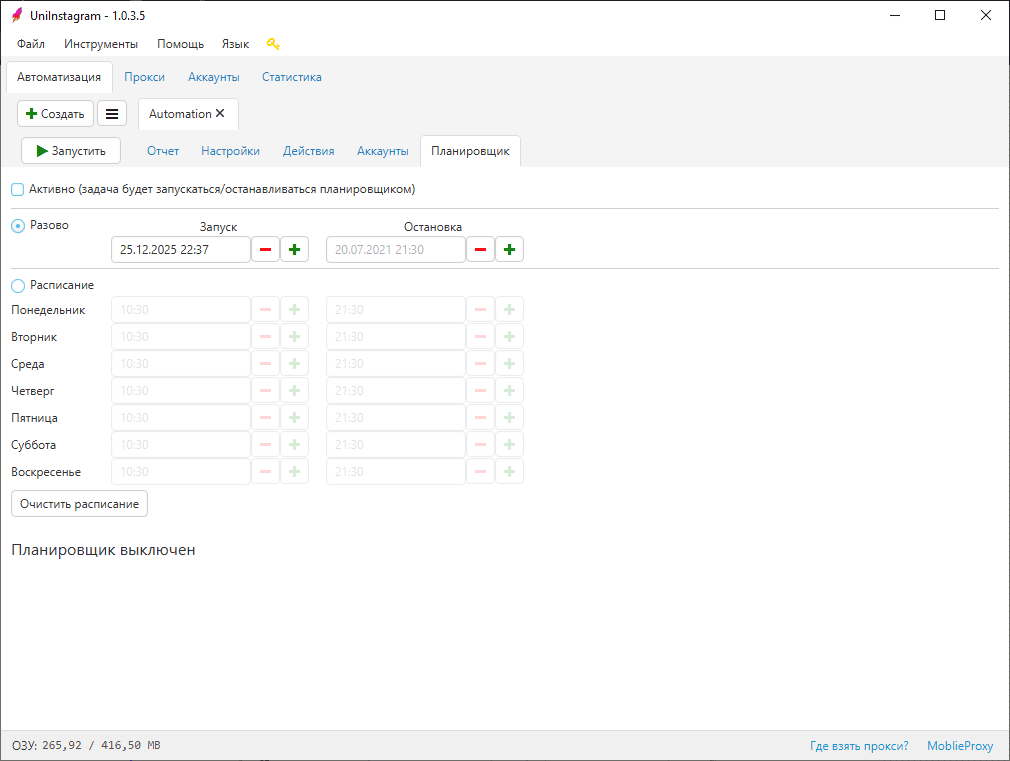
Scheduler
Scheduler lets you configure the start/stop of any task after a certain time or on a schedule.
Active — the checkbox must be enabled for the task to be started/stopped by the scheduler.
Modes:
- One-time — Start and/or Stop the task at the specified time.
- Schedule — Run regularly at the times in the schedule. You can limit the run period via the specified schedule by setting Work dates. For example, if the schedule runs the task every Thursday at 10:00 and Work dates are set from 03.08.2021 to 06.08.2021, the task will run once on 05.08.2021 (Thu) and won't run again after 06.08.2021. Clear schedule removes the entire schedule.