Choosing the device (emulator / phone) and its settings
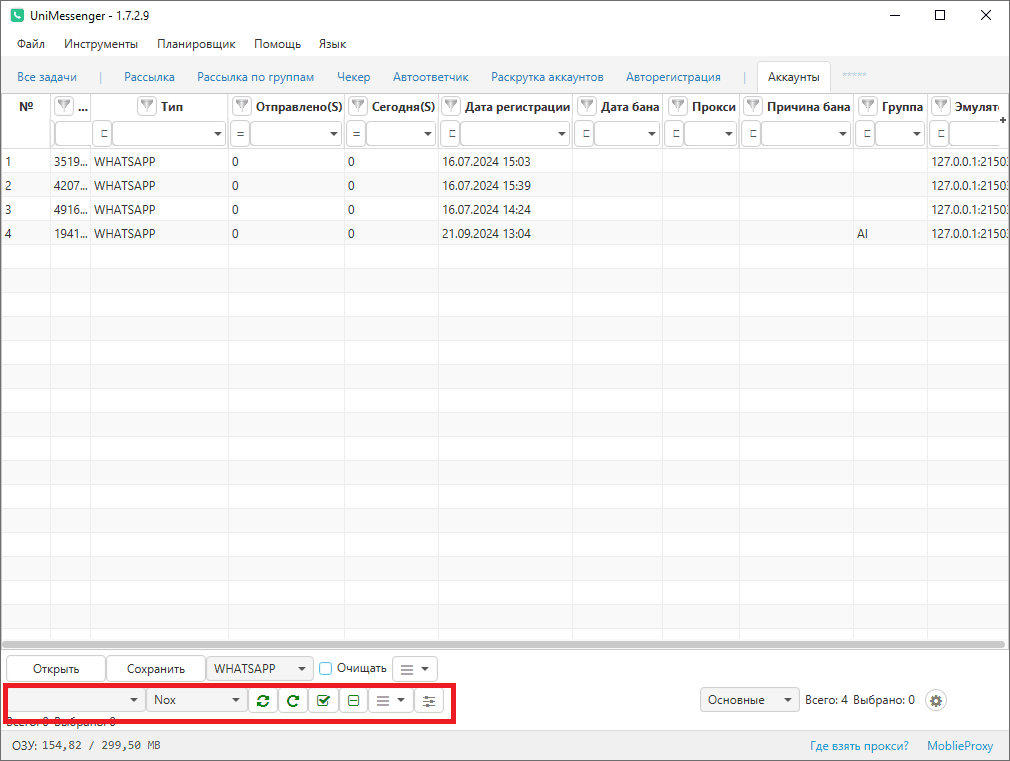
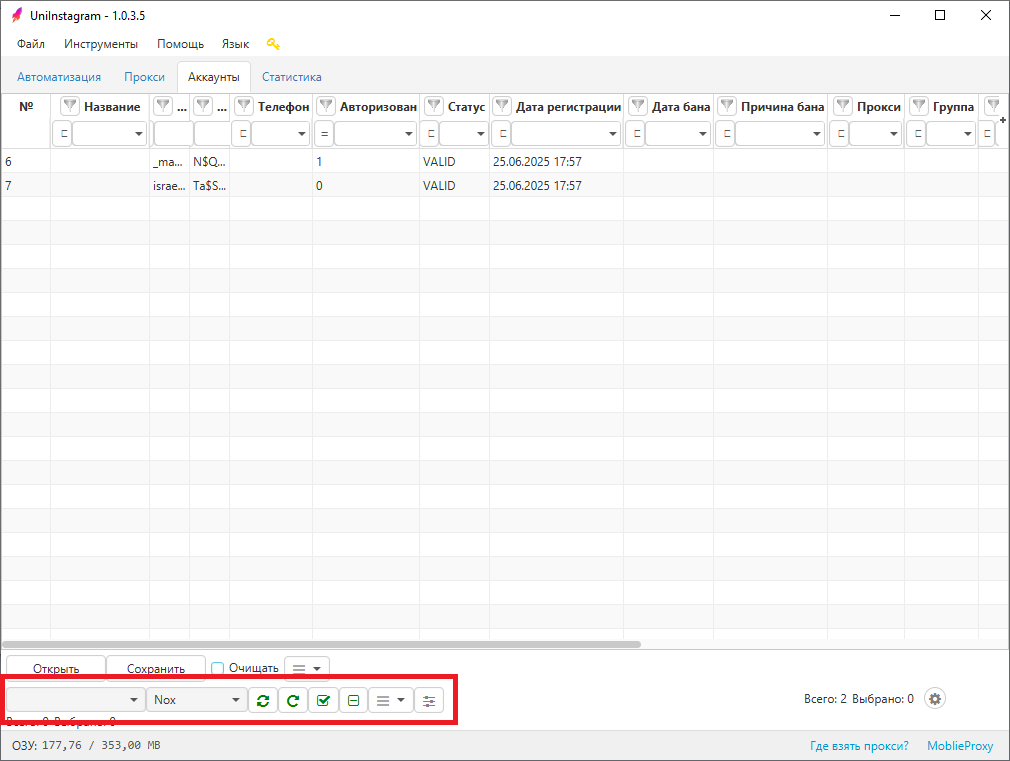
Device selection (emulator / phone), the actions available with it, and its settings are on the bottom panel of the Accounts tab (see Screen 1 for UniMessenger, see Screen 2 for UniInstagram).
Some screenshots or videos may show an outdated interface. There are no critical changes that affect understanding of the main functions.
Device selection (emulator / phone), the actions available with it, and its settings are on the bottom panel of the Accounts tab (see Screen 1 for UniMessenger, see Screen 2 for UniInstagram).
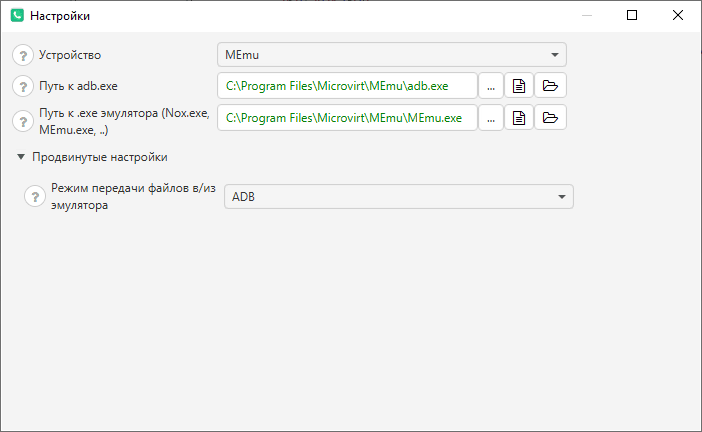
Device settings
- Device — you need to specify which device you are using (Nox / MEmu / LDPlayer / BlueStacks / Phone / Other).
- Path to adb.exe — must be set for the device in use; it is filled in automatically on first launch.
- Path to the emulator .exe (Nox.exe/MEmu.exe) — the emulator is usually installed in Program Files, so look there. Must be set when using the "Reconnect to emulators" or "Uniquize in Nox" functions.
Advanced settings (don't change unless needed): — File transfer mode to/from the emulator — ADB mode is used by default.
Was this article helpful?